
 As promised, here are instructions, photos and tips that follow my work on the Molten Wood band saw box made from a chunk of canary wood.
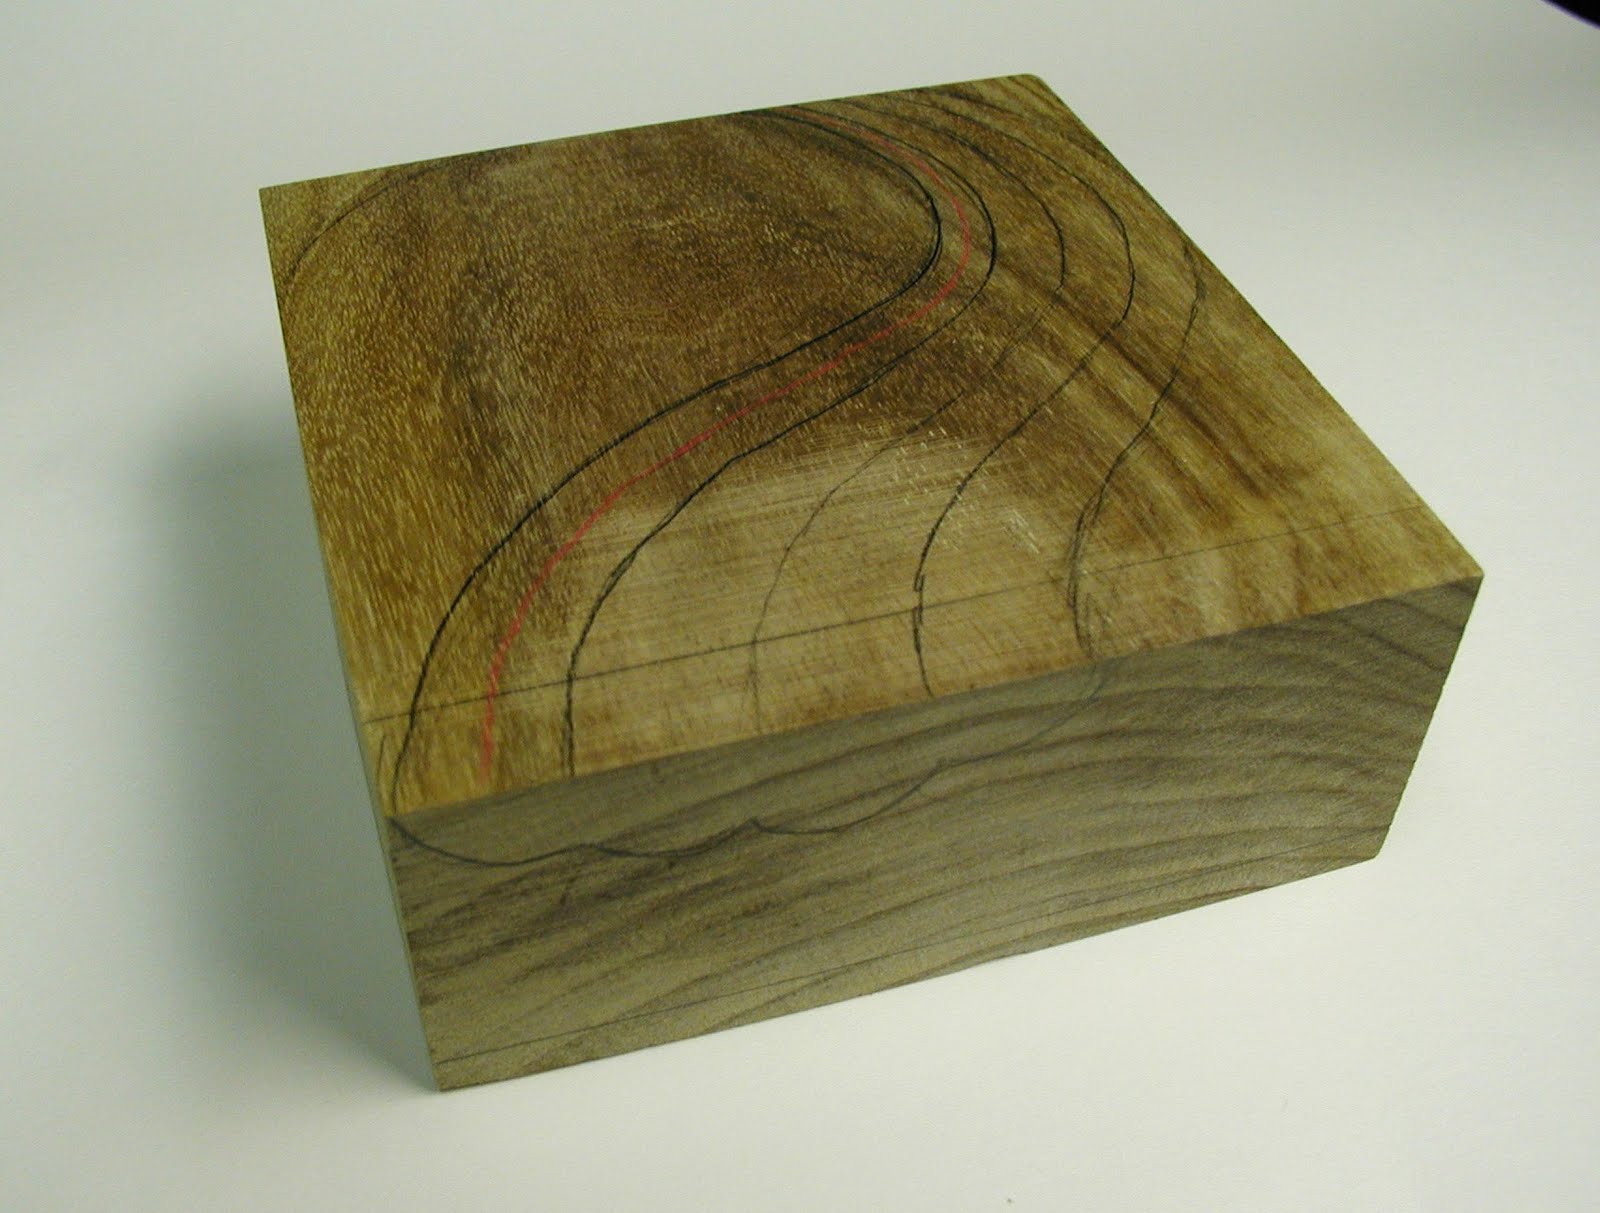 I purchased this slab of canary wood about 6 years ago from a bargain table at Woodcraft. I've been waiting for the right project. The first step is to draw the design on the wood.
 I used power carving tools to get the deep wave grooves. A round bur works best. Start coarse and work to fine.
 Rough shape of the wave grooves completed. It's time to go to the band saw.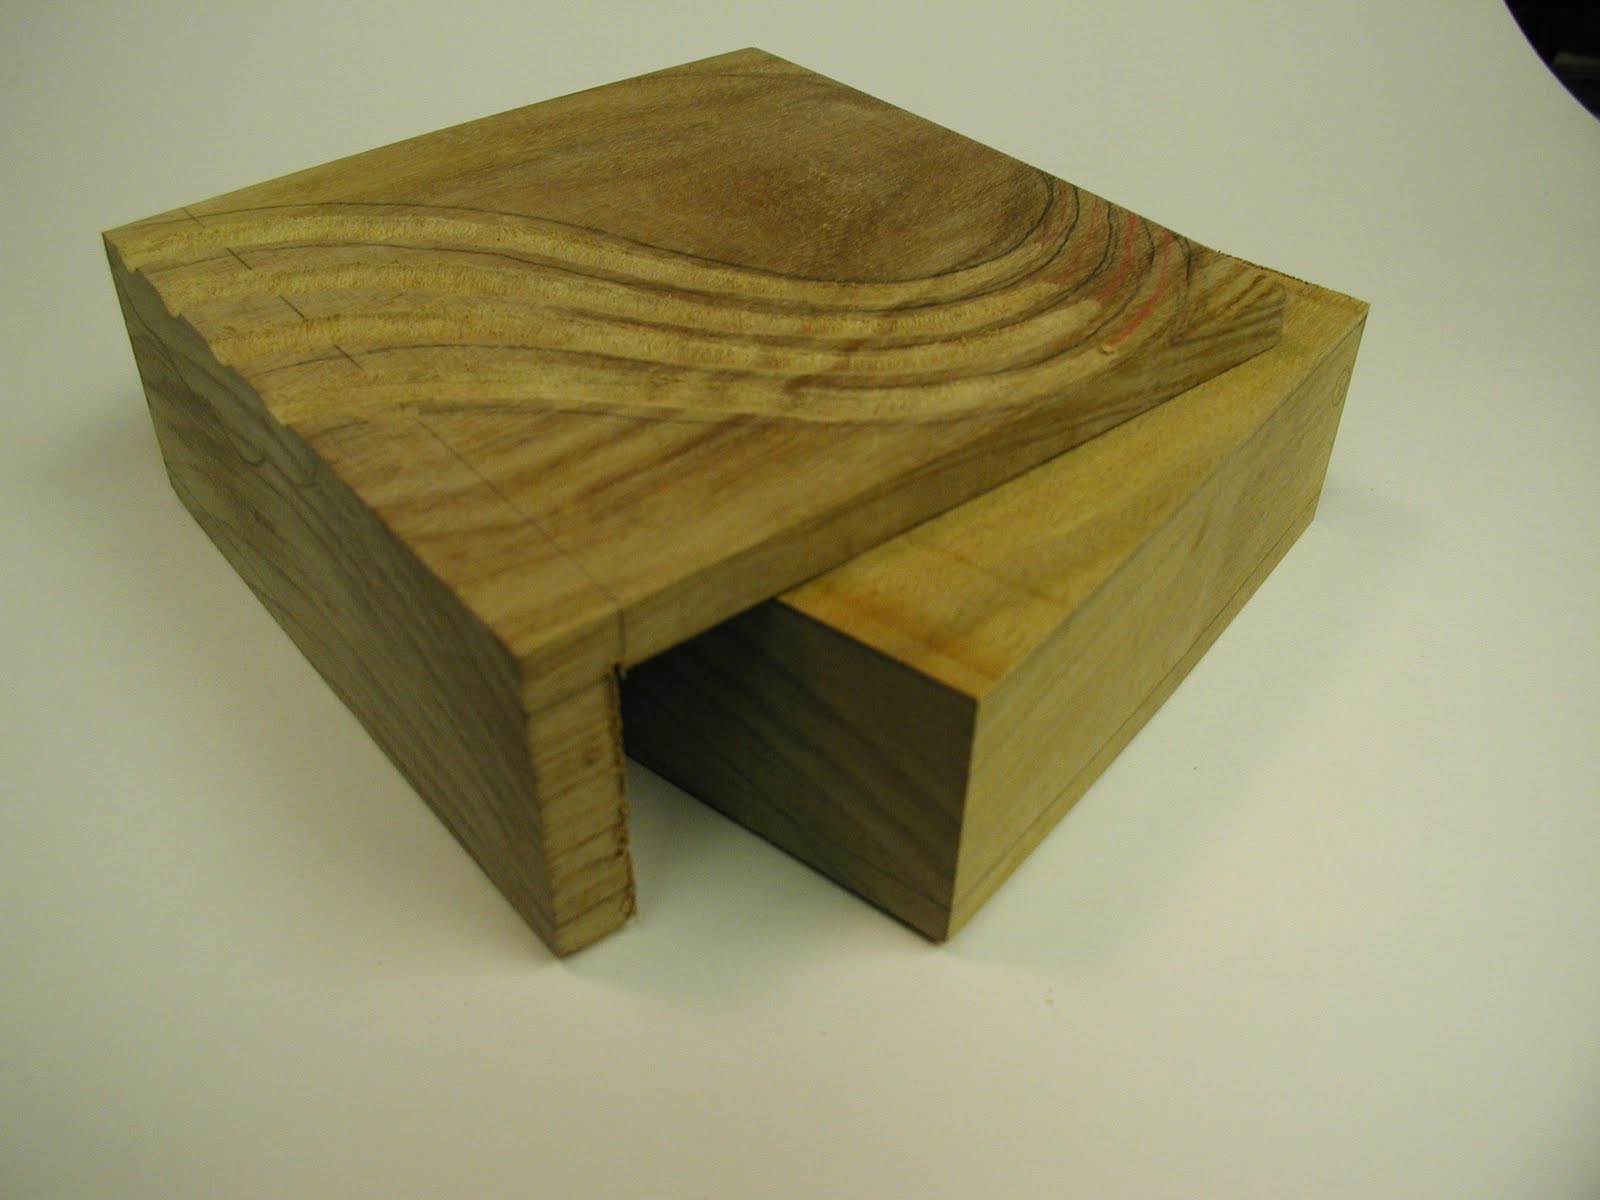
Here's where it gets a little tricky. Instead of just sawing off the top of the box like you would in making a normal band saw box, you saw up to a marked point and then saw at 90 degrees to that line to create the overhang.
 Next, use the band saw to cut out the overhang shape. This is hard to explain, but it is probably obvious to any woodworker.
Here's the way the overhang looks after sawing. As you can see, I cut a little too far into the first wave. This will have to be fixed up later.
 Now, cut off the bottom as you would normally do when making a band saw box.
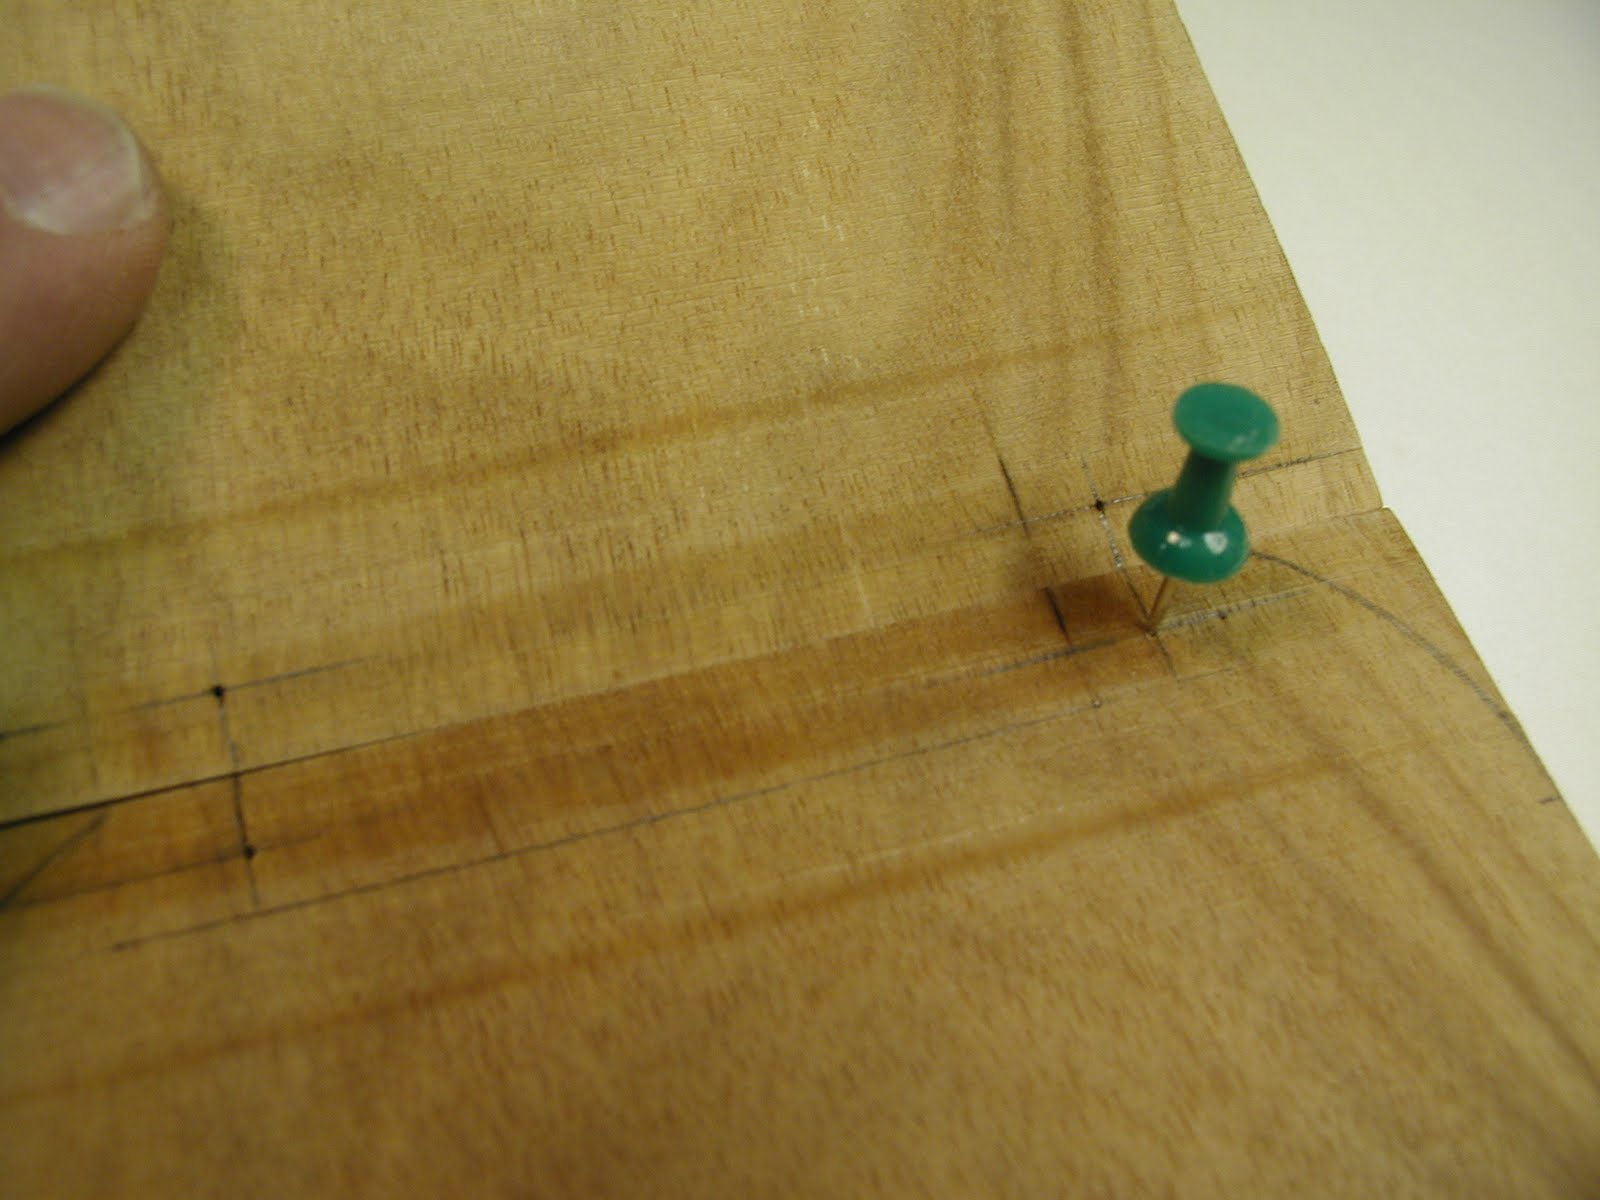 The trickiest part of making this box is getting the barrel hinges to align perfectly. If they are off by even one millimeter, the box will never open and close properly. Accuracy is essential. Wood crafters have many tricks for getting proper alignment. You can find them on the internet. As for me, I have found that careful measurent and a brad tipped drill bit can get you right on the money. I start by exact measurement lines and precise marking with a push pin to set the exact hole center.
 The barrel hinges are cylinders 5 mm in diameter with a hinge pin in the middle. I bought a 5 mm brad point drill bit and I am very pleased with the results.
  I clamped the wood loosely on the drill press and then carefully guided the brad tip of the drill bit into the hole made by the push pin. I then clamped it securely and drilled the hole. Since the box top is thin, be careful with the depth of the hole. The objective is to position the tiny center pin shaft of the hinge exactly at the surface of the wood on both the top and the end of the box.
The next step is to make a 45 degree cut in the lid and the base. The angle must intersect the exact middle point of the hinge at the pin so the lid will open correctly. Needless to say, this can be very tricky. Again, precise measurement is very important. Of course experience and a little luck doesn't hurt either. I used my table saw which is set up with a very accurate 45 degree crosscut sled. In the past I have also used my router table. My wood craftsmanship is far from perfect, so I wound up doing some "corrections" work on the belt sande to get everything to work properly. No glue yet. This is just a dry fit at this point to make sure all the parts work.
 Up until this point I have been working with a squared off block of wood. It is important to have this "right angle" frame of reference for proper alignment and measurements. Now it's time to add some curves. I cut the outer shape of the box on the band saw.
Here's what the box looks like at this point. Remember, the inside is still solid wood.

Take off the top and bottom and use the band saw again to cut the box interior out of the middle section. I entered near the corner so it would be easier to glue and hide the entry point. The dark lines on the curved corners indicate that I need to change my saw blade. A rubber backed sanding cylinder on my rotary tool will get these marks out without much effort.
 Gluing. I use Tightbond II. First glue the center section of the box together at the saw blade entry point. An elastic band clamp works fine for this. Make sure the alignment is exact.
 The next step is to glue the bottom to the box side section. Use good clamps for this. Once clamped, I usually lightly sand the outer surface at the glued joint. The fine saw dust will stick to the glue and fill up any voids in the intersection.
 Now comes the sanding, and lots of it. Notice how the box lid slightly overhands the side of the box. This is caused by gluing together the kerf void on the perimeter section. One side is now a bit shorter. To the belt sander! At this point I am also still forming the waves on top of the box with power carving burs and rotary sanding tools. Hand gouges were also used. Anything that works and is within reach. I mark areas that need wood taken away with a red pencil. I do this regularly during the forming process. Shape. Stop and take a look. Mark. Shape some more. A lot of patience and a lot of sawdust.
Next, I gave the whole box a light coat of wipe-on polyurethane varnish. In this photo of the back of the box, notice how the 45 degree cut is precisely at the center of the barrel hinge hole. I use epoxy to secure the barrel hinges and open and close the box severall times during the 5 minutes it takes the epoxy to set to make sure the cover sets and opens correctly. After fine sanding, I put a few coats of satin poly varnish on the box as a finish coat.
 As any artisan will tell you, you have to know when to stop improving what you have and call the piece "finished". I had a perfect reminder of this on this box. I kept on sanding away on the wave grooves until I sanded right through the wood. Yikes! After hours and hours of work, I now had a hole right in the key focus spot of the piece. A tiny hole, but to me it seemed like you could drive a truck through it. Of course I panicked and thought it was the end of the world. But a little wood filler and some very precise staining and you can hardly notice the flaw. Look at the second groove from the left.
So that's how I made the box. I probably could have included another 8 or 9 photos, but it is very lengthy as it is. I hope these instructions and personal tips will be of help to you. Let me know if they were.


 Lately I have really been immersing myself in the flowing beauty and simplicity of Art Nouveau and the Arts and Crafts Movement that flourished in the early years of the 20th Century. The Art Nouveau style is exemplified by artistic geniuses such as Alphonse Mucha, Gustav Klimt, Louis Comfort Tiffany and Charles Rennie Mackintosh. During the same time period, other artisans such as Gustav Stickley, Elbert Hubbard, and Charles Rohlfs, and architects such as Frank Lloyd Wright and Greene & Greene contributed to what came to be known as the Arts and Crafts Movement. Both movements became interwoven and formed a new design style which was a deliberate departure from the overly ornate Victorian style that preceded it. Each artist, artisan and architect had his or her own style, yet each expressed a common belief in simplicity of form and a communion with nature. The art of this period took a critical look at the new age of machinery and mass production. As an alternative, it emphasized hand craftsmanship and locally skilled creative workers.


