Showing posts with label band saw boxes. Show all posts

Tuesday, January 14, 2014

Bandsaw Box for Storing Flies

 
I love fly fishing.  I enjoy standing in the stream and feeling nature surround me.  I enjoy the challenge of trying to make a perfect cast where the fly line just rolls out to exactly where you want the fly to land.  I enjoy watching the pattern of the water flowing over the rocks.  Someone once told me that, at times, a trout will actually get snagged on the sharp little hook attached to the fly at the end of your line.  I think he was making it up.  I never catch any fish.  But I do enjoy the experience. 

I got an idea to make a fly storage box using band saw box techniques.  I could use magnets for closure, but what could I use for a hinge?  All of the hand-made wooden fly boxes I found on the internet used brass hinges.  They required extra thickness of the wood and, from my experience, were difficult to set perfectly on small boxes.  I got the idea of using a thin leather strip as the hinge.  It was all trial and error from that point, so I made a prototype out of 2x6 pine.  I know nothing about leather, so I made a trip to my local Tandy Leather store, which proved to be very helpful.  I picked out about $2 worth of leather from the scrap bin, which will probably be enough for my next 20 projects ;-).  The clerk/leather expert also recommended a small bottle of neatsfoot oil, which is used to make leather very soft and flexible.  I was not aware of this magic oil, but apparently any serious baseball player with a mitt is very familiar with it.  I used epoxy to adhere the leather hinge strip to the wood.  After a few adjustments, I got the hinge to work just fine.  Here are some photos showing steps in the process.  If anyone else out there has had any experiences with leather box hinges, I would love to hear about them.

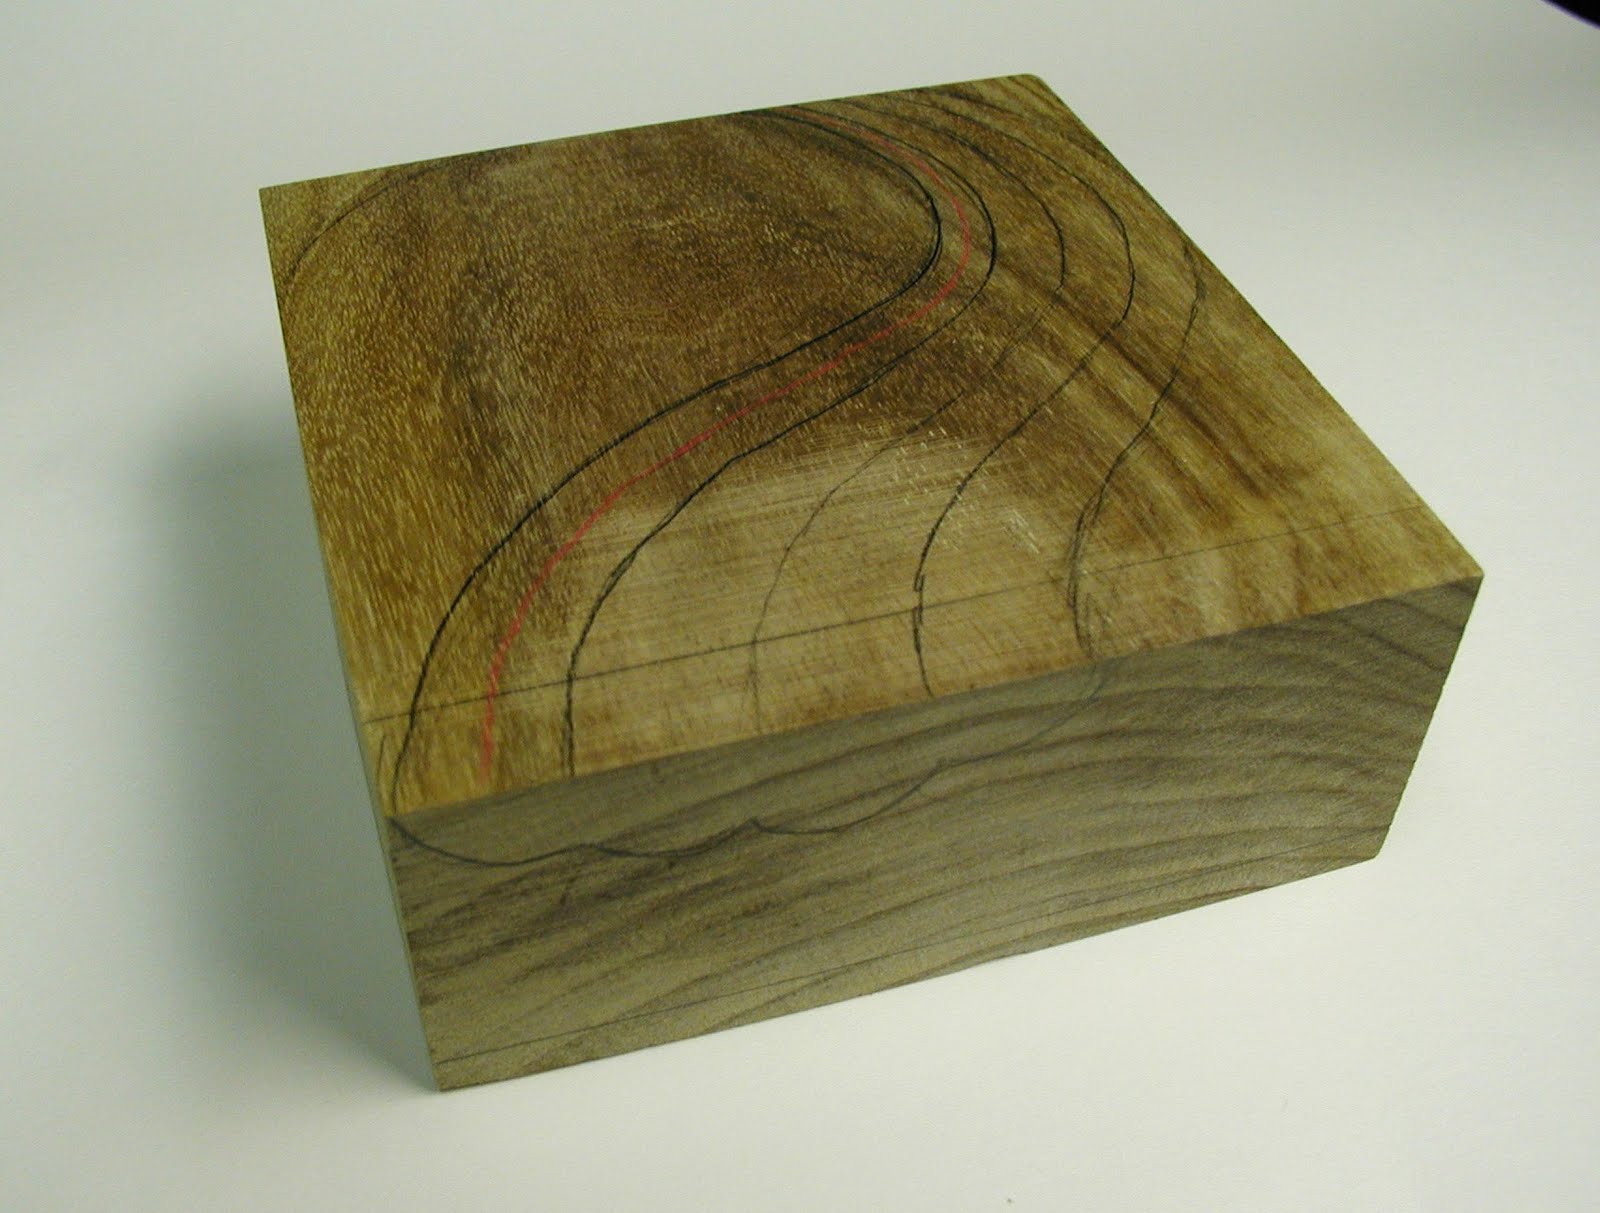
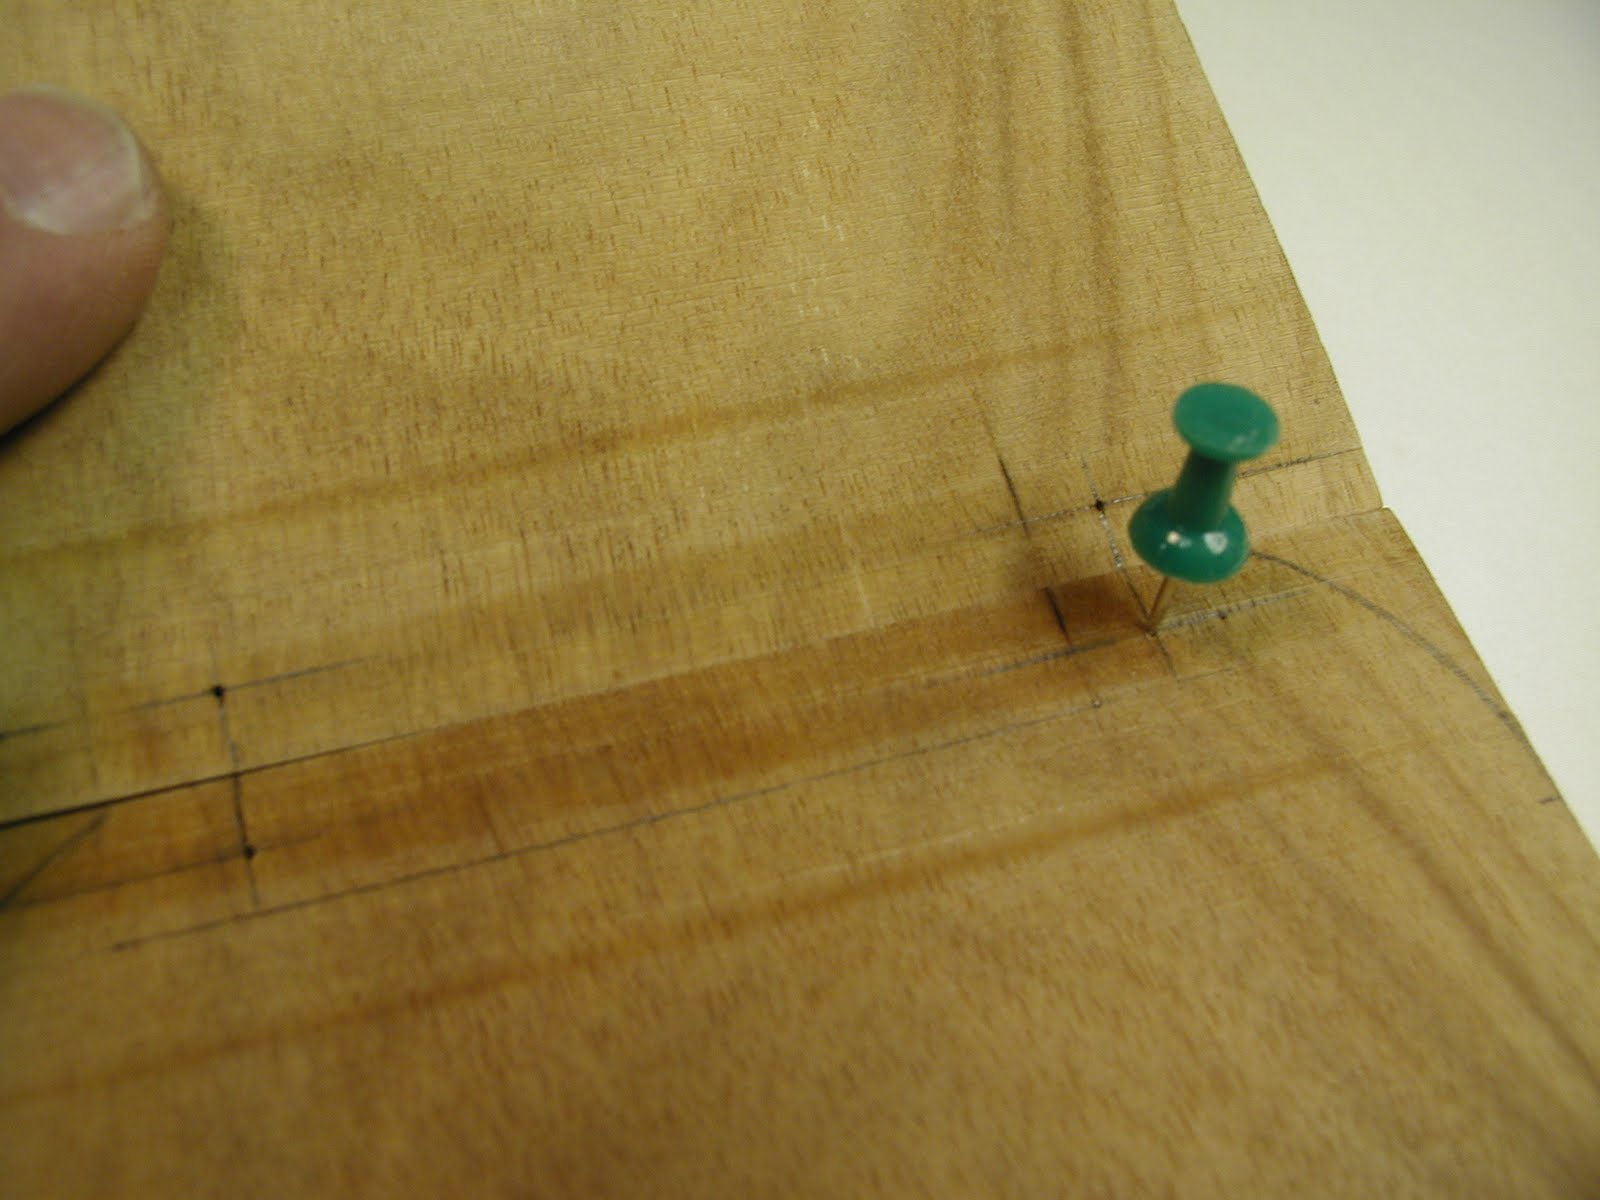
A router was used to cut out the groove for the leather
hinge strip, before the box was sawn into two halves.
The leather was 0.07 " thick.
 
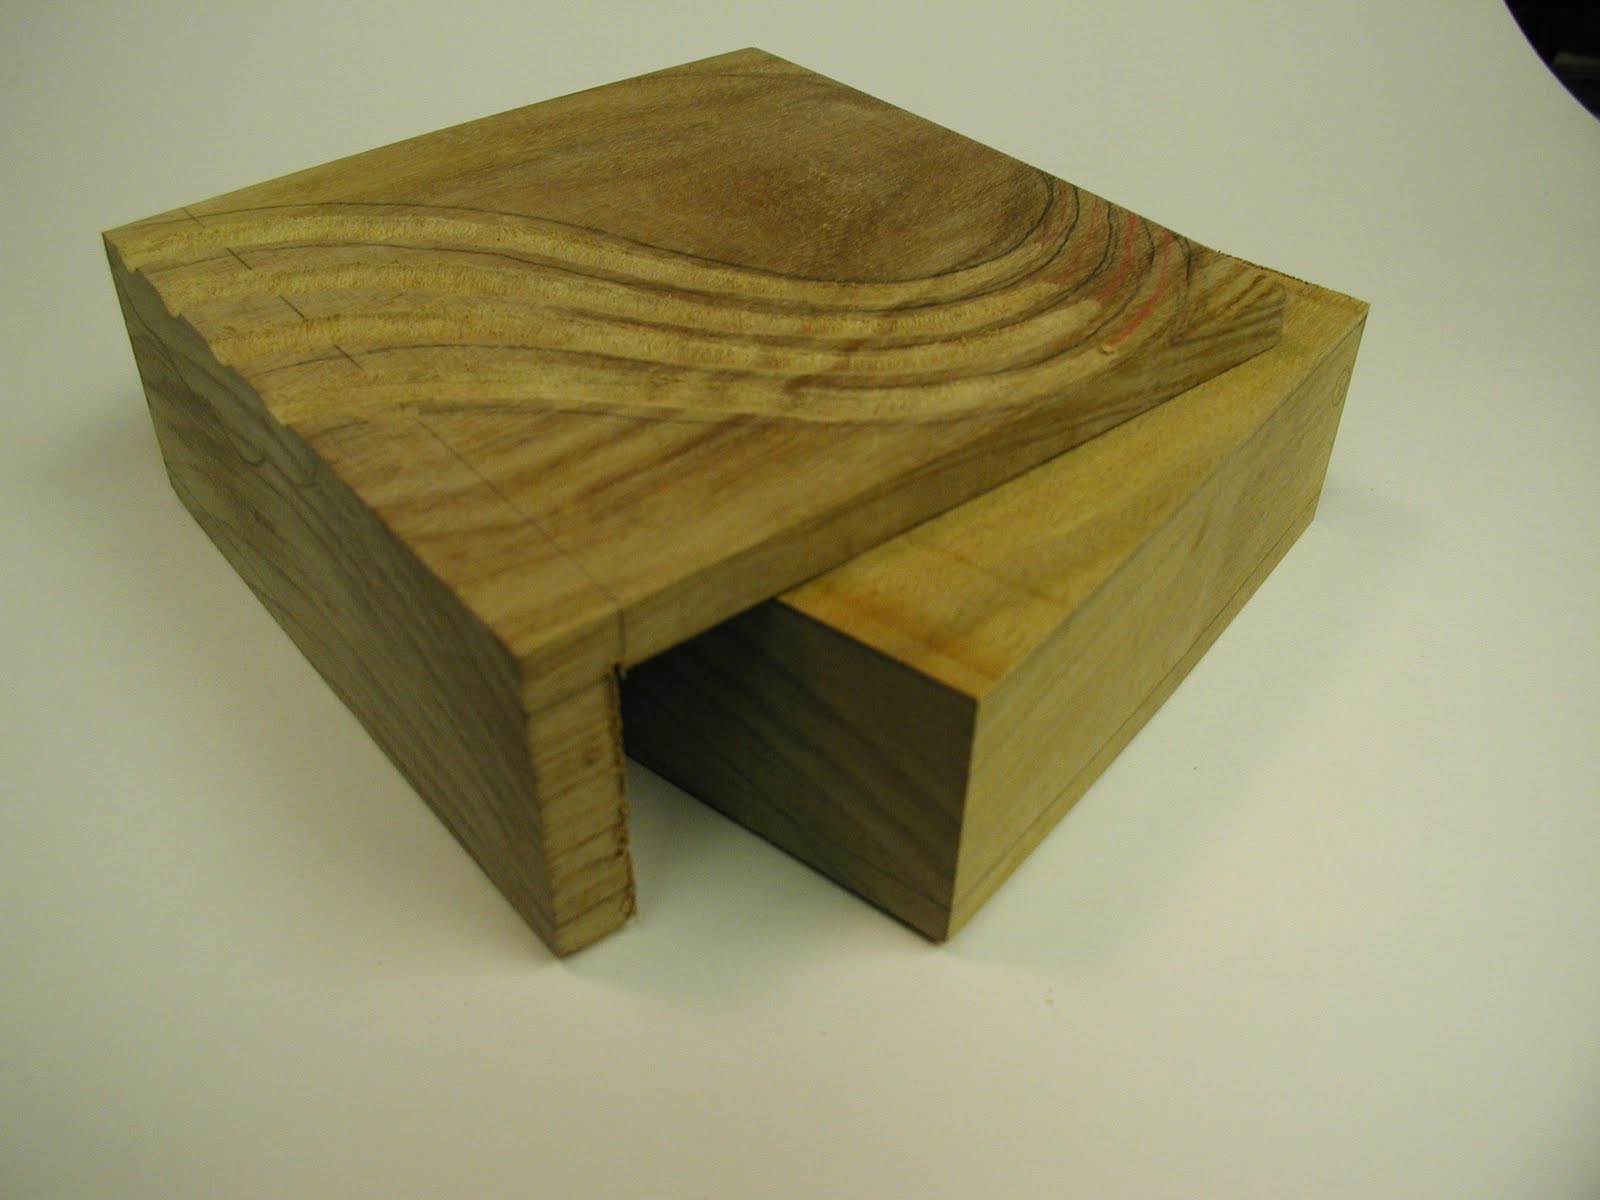
The leather hinge strips were glued on using a strong epoxy. 
The photo shows the leather strip being clamped during glueing.
A scrap of wood was used to provide even pressure.

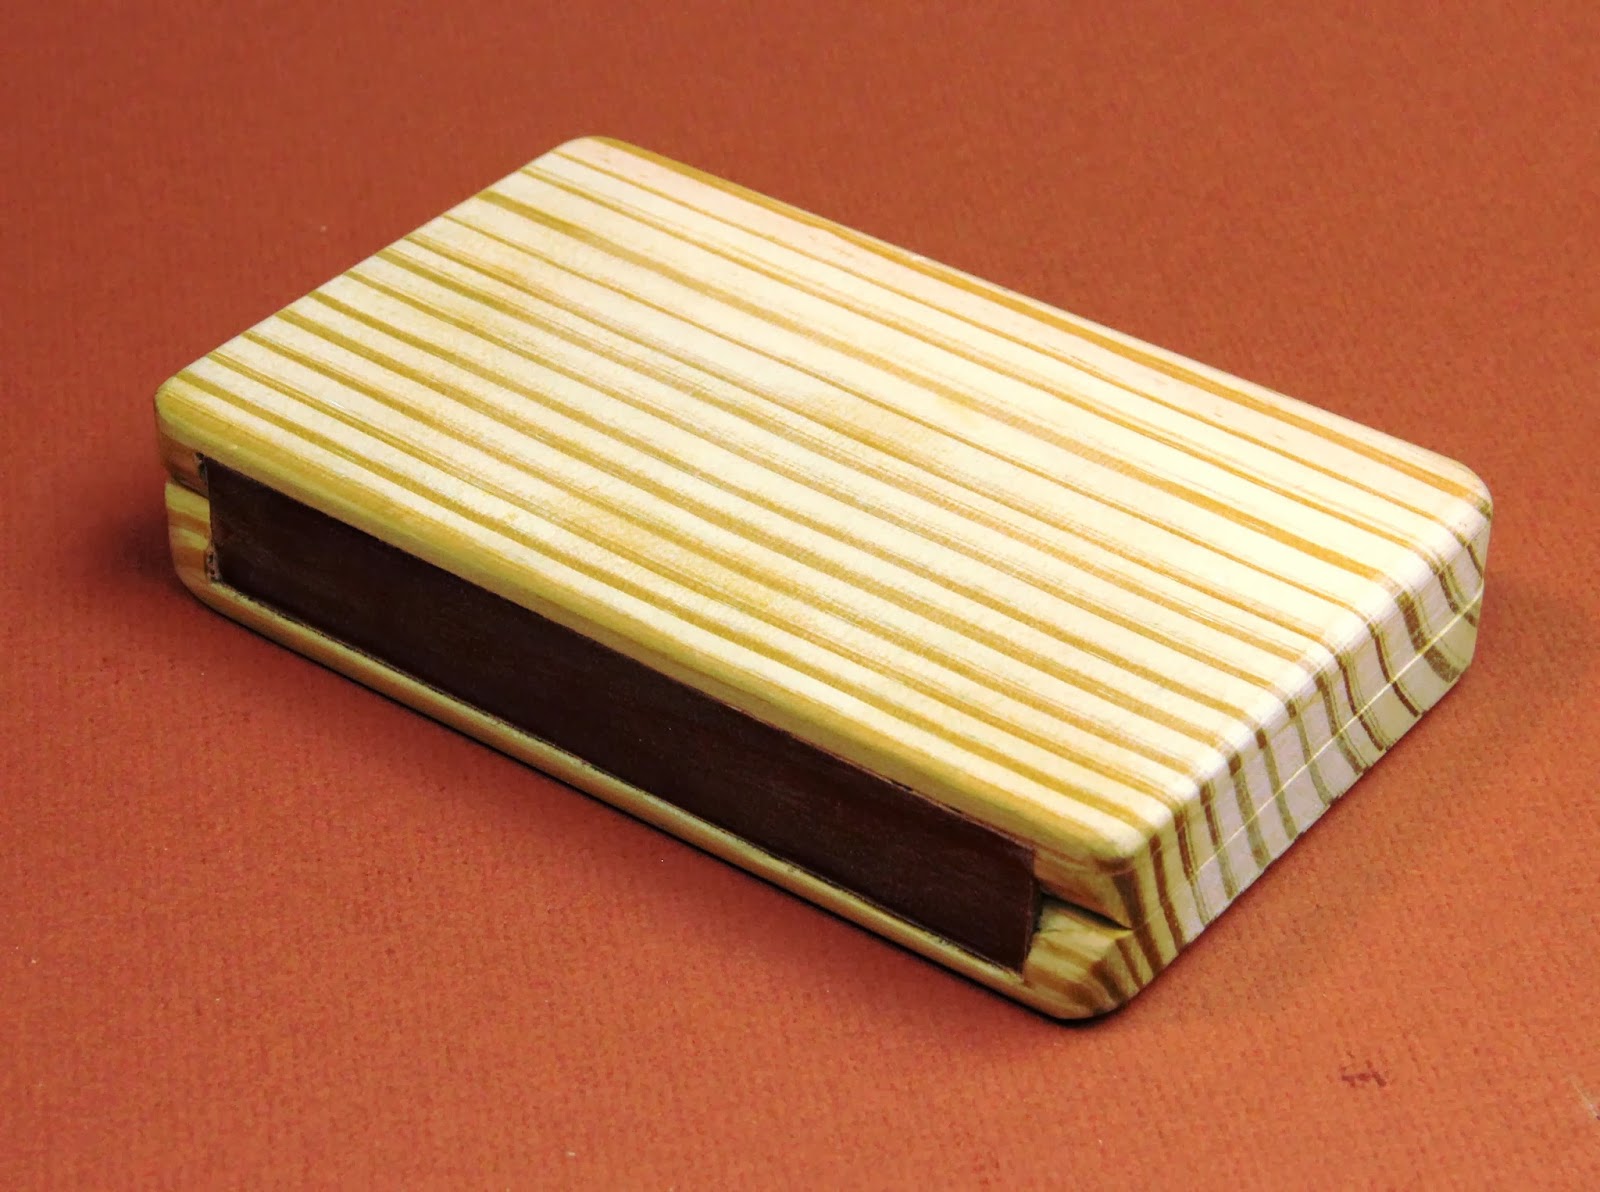
A prototype was made out of a common 2x6 to test glueing
method and clearances.  I found that a thin strip of masking
tape down the middle of the hinge kept it free from epoxy
so it remained more flexible..

Neatsfoot oil was liberally placed on the leather hinge strip
using a cotton swab.  This provided even more flexibility.

This photo shows the leather hinge flexing

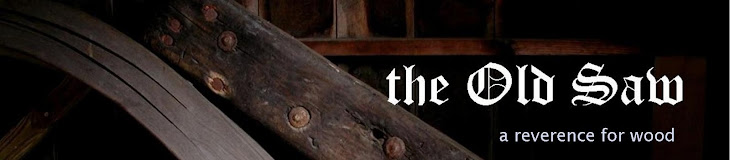
The finished products.  I made one from walnut
and the other from spalted silver maple. 


Friday, February 18, 2011

Making the Canary Wood Box

As promised, here are instructions, photos and tips that follow my work on the Molten Wood band saw box made from a chunk of canary wood.

I purchased this slab of canary wood about 6 years ago from a bargain table at Woodcraft. I've been waiting for the right project. The first step is to draw the design on the wood.


I used power carving tools to get the deep wave grooves. A round bur works best. Start coarse and work to fine.


Rough shape of the wave grooves completed. It's time to go to the band saw.


Here's where it gets a little tricky. Instead of just sawing off the top of the box like you would in making a normal band saw box, you saw up to a marked point and then saw at 90 degrees to that line to create the overhang.


Next, use the band saw to cut out the overhang shape. This is hard to explain, but it is probably obvious to any woodworker.


Here's the way the overhang looks after sawing. As you can see, I cut a little too far into the first wave. This will have to be fixed up later.


Now, cut off the bottom as you would normally do when making a band saw box.


The trickiest part of making this box is getting the barrel hinges to align perfectly. If they are off by even one millimeter, the box will never open and close properly. Accuracy is essential. Wood crafters have many tricks for getting proper alignment. You can find them on the internet. As for me, I have found that careful measurent and a brad tipped drill bit can get you right on the money. I start by exact measurement lines and precise marking with a push pin to set the exact hole center.


The barrel hinges are cylinders 5 mm in diameter with a hinge pin in the middle. I bought a 5 mm brad point drill bit and I am very pleased with the results.


I clamped the wood loosely on the drill press and then carefully guided the brad tip of the drill bit into the hole made by the push pin. I then clamped it securely and drilled the hole. Since the box top is thin, be careful with the depth of the hole. The objective is to position the tiny center pin shaft of the hinge exactly at the surface of the wood on both the top and the end of the box.


The next step is to make a 45 degree cut in the lid and the base. The angle must intersect the exact middle point of the hinge at the pin so the lid will open correctly. Needless to say, this can be very tricky. Again, precise measurement is very important. Of course experience and a little luck doesn't hurt either. I used my table saw which is set up with a very accurate 45 degree crosscut sled. In the past I have also used my router table. My wood craftsmanship is far from perfect, so I wound up doing some "corrections" work on the belt sande to get everything to work properly. No glue yet. This is just a dry fit at this point to make sure all the parts work.


Up until this point I have been working with a squared off block of wood. It is important to have this "right angle" frame of reference for proper alignment and measurements. Now it's time to add some curves. I cut the outer shape of the box on the band saw.


Here's what the box looks like at this point. Remember, the inside is still solid wood.


Take off the top and bottom and use the band saw again to cut the box interior out of the middle section. I entered near the corner so it would be easier to glue and hide the entry point. The dark lines on the curved corners indicate that I need to change my saw blade. A rubber backed sanding cylinder on my rotary tool will get these marks out without much effort.


Gluing. I use Tightbond II. First glue the center section of the box together at the saw blade entry point. An elastic band clamp works fine for this. Make sure the alignment is exact.


The next step is to glue the bottom to the box side section. Use good clamps for this. Once clamped, I usually lightly sand the outer surface at the glued joint. The fine saw dust will stick to the glue and fill up any voids in the intersection.


Now comes the sanding, and lots of it. Notice how the box lid slightly overhands the side of the box. This is caused by gluing together the kerf void on the perimeter section. One side is now a bit shorter. To the belt sander! At this point I am also still forming the waves on top of the box with power carving burs and rotary sanding tools. Hand gouges were also used. Anything that works and is within reach. I mark areas that need wood taken away with a red pencil. I do this regularly during the forming process. Shape. Stop and take a look. Mark. Shape some more. A lot of patience and a lot of sawdust.


Next, I gave the whole box a light coat of wipe-on polyurethane varnish. In this photo of the back of the box, notice how the 45 degree cut is precisely at the center of the barrel hinge hole. I use epoxy to secure the barrel hinges and open and close the box severall times during the 5 minutes it takes the epoxy to set to make sure the cover sets and opens correctly. After fine sanding, I put a few coats of satin poly varnish on the box as a finish coat.


As any artisan will tell you, you have to know when to stop improving what you have and call the piece "finished". I had a perfect reminder of this on this box. I kept on sanding away on the wave grooves until I sanded right through the wood. Yikes! After hours and hours of work, I now had a hole right in the key focus spot of the piece. A tiny hole, but to me it seemed like you could drive a truck through it. Of course I panicked and thought it was the end of the world. But a little wood filler and some very precise staining and you can hardly notice the flaw. Look at the second groove from the left.


So that's how I made the box. I probably could have included another 8 or 9 photos, but it is very lengthy as it is. I hope these instructions and personal tips will be of help to you. Let me know if they were.

Saturday, February 12, 2011

Molten Wood


Ask any kid. Sculpting with clay is fun. Playing with Silly Putty is even more fun. If you let it sit on an edge, it would ooze and flow over time. Sculpting with wood is a lot harder. You can’t just push the wood around like clay to change the shape. You can’t just let it ooze over the edge. But maybe you can make the wood look like you just formed it like clay. Maybe you could make the wood look like it was melting. This is what I have tried to accomplish in my latest experiment with hinged-lid band saw boxes.

The light rectangular box is made out of spalted maple from my yard. The darker, squarer shaped box is made of canary wood. Each is cut from a solid piece of wood using band saw box techniques. Each uses small barrel hinges for the lid, so it remains attached.


I took pictures during the entire process of making the canary wood box. I will show them with step-by-step instructions in my next post for anyone who is interested.

Tuesday, March 16, 2010

Presto Box


Well, here’s what I did with the box elder wood. I designed a new type of band saw box. I call it the Presto Box. It has two compartments, each with a lid, and normal hinge pin construction. However, I extended the top of the box beyond the hinge pin to create a, sort of, actuation lever. When you press the top ends of the box, “Presto”, the lid opens.


Construction was kind of tricky using templates and lots of careful cuts on the band saw. I made two boxes since I found it is always better to multiples of a new design to learn the most about what not to do next time.


A coat of tung oil on the finished boxes really brought out the red streaks in the box elder. Almost too vivid. It looks like my granddaughter scribbled over a maple box with a Magic Marker. The larger box is 7 1/2" x 4" x 2".


This shape is only one adaptation of the design concept. I can picture all sorts of shapes that would give the same effect. These first two boxes are really “proof of concept” prototypes. Don’t look too close, or you will see all the flaws and mistakes. The next ones will be much better now that I’ve learned a few tricks. I guess we should all learn from our mistakes and keep on trying to improve.

Thursday, October 15, 2009

the Hope Box - Part 4 - Finished!

Finished at last! So what did I learn from this project? Well, I learned that I get a little better with each piece that I do. I guess that’s good, but I still feel like an amateur when I compare my craftsmanship to what I see from others. Funny thing, when I finished the original Hope Box, the prototype made out of common basswood, I thought the result was the best thing I had ever done. My new Hope Box is a slightly different design, and made of beautiful old black walnut. I like it much more than the old one. Maybe I am getting better. I’m still making mistakes, but I’m learning from them. I look forward to the time when I can fully retire and devote more time to my wood shop / studio.

Saturday, October 10, 2009

the Hope Box - Part 3

Into the serious band saw work. With the ½” blade still on the band saw, and the sides still perpendicular to the base, I cut the box top and the bottom piece. Then I cut the side tapers by tilting the band saw table top. Of course, that made the previously cut bottom piece slightly wider than the sides, but it was easily adjusted with some shaping work on the belt sander.

I then changed to a 3/16” blade for the curved cuts. I kept the band saw table at the same angle setting so the inner sides would be tapered at the same angle as the outer sides. I took a deep breath and carefully cut out the box opening. This is always a scary operation for me. If you mess up here, you have wasted a whole lot of time. Sometimes I do a cut or two on an old piece of scrap wood just to get comfortable with the motions. Sort of like a pitcher taking warm-up pitches.
The smaller ring forms the rim of a hidden bottom compartment.

I have a fear of the band saw. I always have and I always will. My fingers are an inch or so away from a very powerful, sharp, whining blade. A small slip-up could cause some serious changes in my life. Fear is not necessarily a bad thing. My fear of the band saw is a kind of respect. I respect the power it has. At the same time, I know that its power is controlled within certain physical dimensions. If I do not come in contact with the moving blade, I will not be harmed, and the power will work for me. The power of the band saw becomes my power.

If using a powerful band saw creates a high level of keen awareness and excitement, then the repeated motion of hand sanding produces a level of boredom that would be at the exact opposite end of the scale. Sanding is boring. There are no two ways about it. Any beautifully crafted box must go through this dreaded hand sanding process. There is no way to skip it. Sure, there are power sanders that can get you most of the way, but the final finishing sanding must all be done by hand. All of the great wooden (or stone) sculptures that we admire in museums, or the carved wooden architectural details that fascinate us in churches and mansions, were all sanded tediously by hand by some poor artisan with tired forearms.
The finished form, all glued and ready for hand sanding.

Friday, October 2, 2009

the Hope Box - Part 2

I finally found some time to get back to the box. I was about to say that cutting the shape with the band saw is a critical step, but then I realized that they are all critical steps. I use a small 10" Rikon band saw which has a vertical clearance of only 3 1/2". This severely limits the size of the boxes I can make.
Working with these smaller blocks of wood can sometimes put my precious fingers dangerously close to the saw blade. Believe me, I have a great respect for that blade, but more about that in some later posting.


I used gouges and power burrs to take out wood on the sides and approach the final rough shape of the arches.


The band sawing exposed a crack in the wood which wasn't visible from the outside. However, the piece seems strong, so I may be able to use some filler. I always save fine wood dust from sawing, sanding or power forming in a small tin for filling in such cracks or kerf cut marks.


Here is the new rough shape. There is still a lot of forming to do on the arches. I have left the sides square, not making the bottom box side angle cuts yet, so that I can easily saw off the box top at a right angle to the side, and parallel to the base.


Monday, September 28, 2009

Hand-Crafted Wooden Boxes


Boxes have been used since ancient times to store, separate and protect things. They can store common things like corn flakes or sugar. Or they can store very precious items like jewelry and mementos and separate them from the every day items. These specially crafted storage boxes are the objects of my interest. They can be made of metal or glass; of plastic or cardboard, but it seems that the vast majority of these types of specialty crafted boxes are made from wood.


Storage boxes are somewhat of a dichotomy. They conceal, yet at the same time, they invite you to open them. When you open such a storage box it is usually to remove some special object. It can be an important moment in time. You are revealing the concealed. You are resurrecting objects and memories that have been hidden for a period of time, perhaps even a long period of time. You may be seeking a piece of jewelry to wear at a special event. You may be searching for answers to questions about the past. You may be in financial need and looking to sell something that has great value. Or, you may be simply getting out a good cigar for your enjoyment.


If the box has hidden its contents for a long period of time, opening it might produce surprise and excitement. It also may produce many other feelings. You may not remember what you put into the box. Once you open it, memories come to life. Each of the objects has its own story attached to it. Do you remember where you were when you first received that object? Do you remember who gave it to you? Do you remember the feelings at the time?

Crafted wooden storage boxes are indeed a very special part of everyone’s life.


Friday, September 25, 2009

the Hope Box - Part 1

I make band saw boxes. I call my latest project “the Hope Box”. I got inspiration from a design, by an artist by the name of Ron Lowe, which I saw in the book called “400 Wood Boxes” by Lark Books. (Check out this book if you want to get blown away by wonderful creative design in wooden boxes.)


I first made a Hope Box out of basswood as sort of a prototype. There was a lot of tricky work involved, on the drill press, the band saw and with hand rasps and carving tools. I stained the resulting box to cover a few errors, but overall, I was pretty pleased with it. See the photo on the right.

I had a nice chunk of black walnut that I bought from the local sawmill for a few bucks. I thought it would be ideal for making a “good” Hope Box or two. The photos show the walnut block with the openings rough drilled. The next step is to cut the outer profile with the band saw. I’ll keep you up to date on my progress with photos.

black walnut block (left) with basswood "prototype" (right)

block with openings drilled through