Showing posts with label wood carving. Show all posts

Wednesday, October 16, 2013

Inspiration Stagnation Liberation

photo of my zinnias
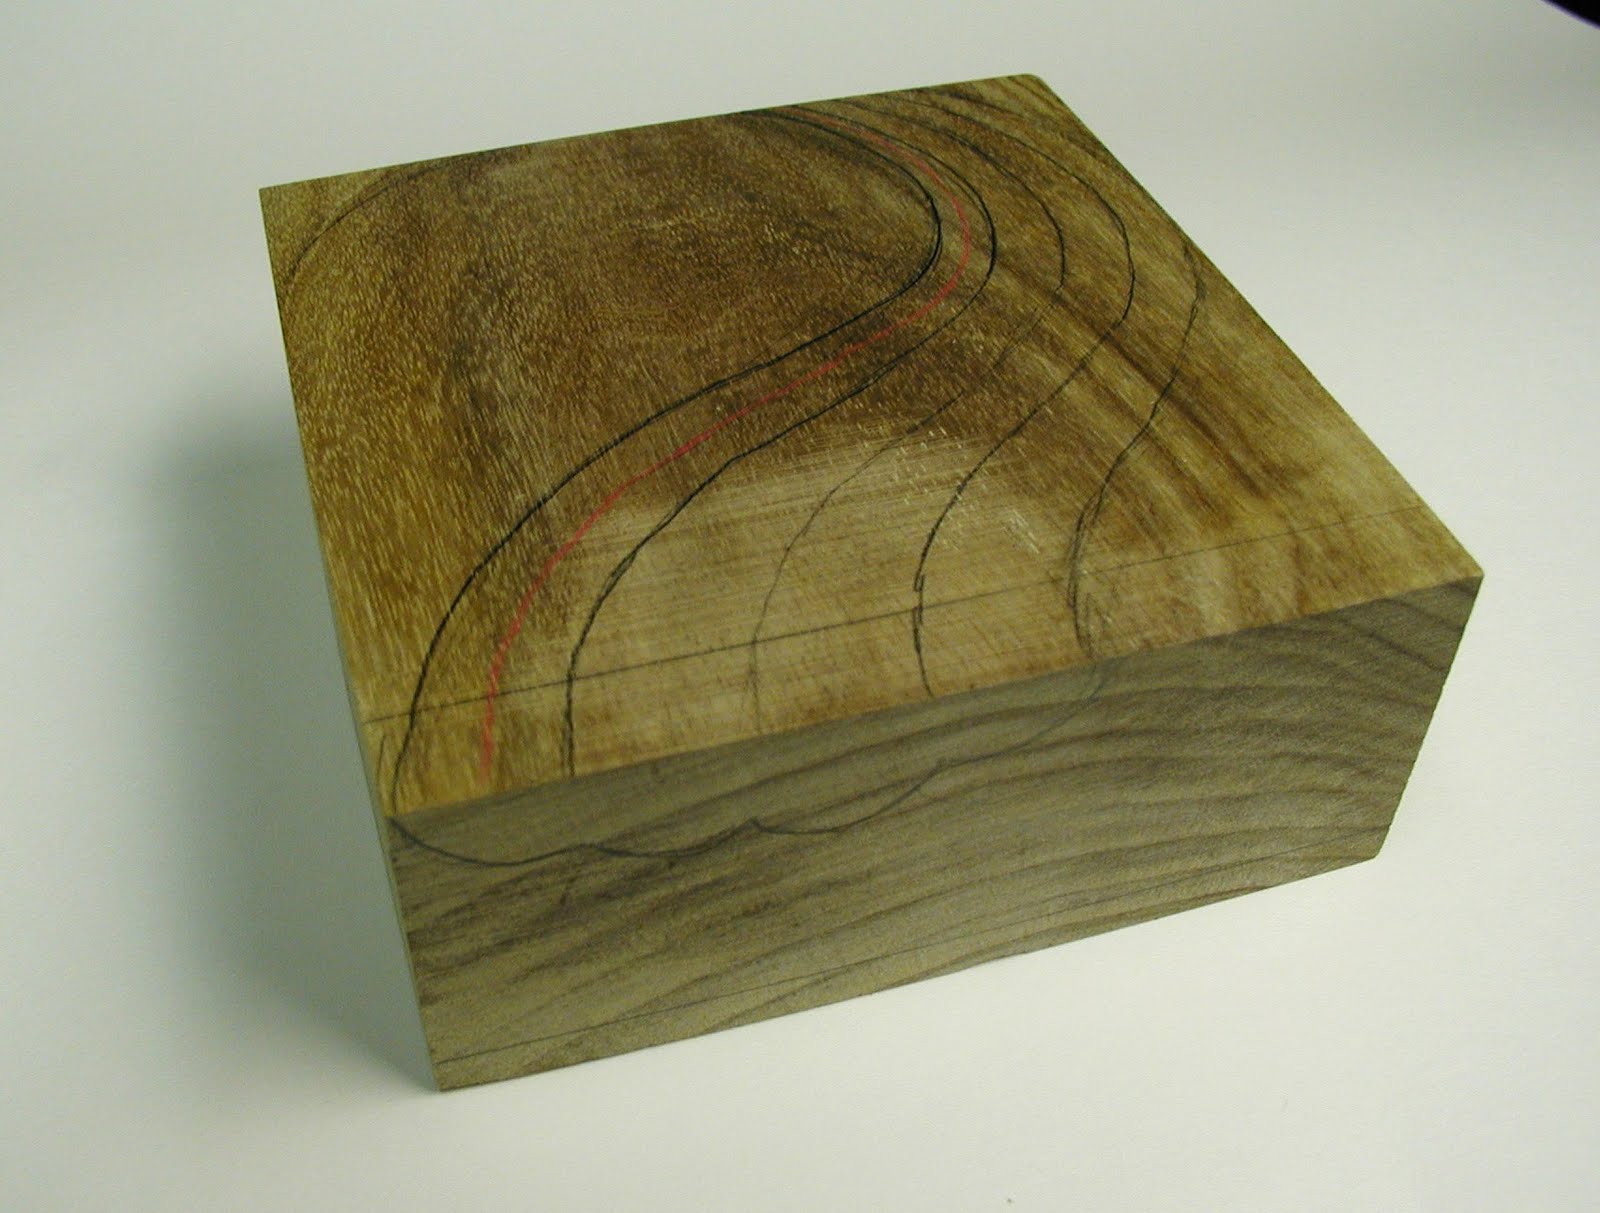
top of carved cigar box


I’ve heard of writer’s block, but I wonder if there is such at thing as carver’s block.

I had this beautiful discarded cigar box made of thick cedar wood.  It was just aching to be carved, but the box sat for weeks because I had no inspiration what-so-ever about what to carve on it.  I could use one of those graphic Japanese crest symbols, or Celtic designs, but this box had a certain elegance that seemed to cry out “flowers”.  I went through images of flowers on the internet, but nothing popped out.  I then decided to go through my own file of flower photographs that I had taken myself.  Bingo!  I found a nice photo of zinnias taken in my front yard. 
 
With some tweaking, the design seemed to fit the box well.  It had nice detail, but not too difficult to carve. I printed the photo on plain paper and then simplified the flowers by selected the elements of the design that I thought would make a good carving on the lid of the box. 
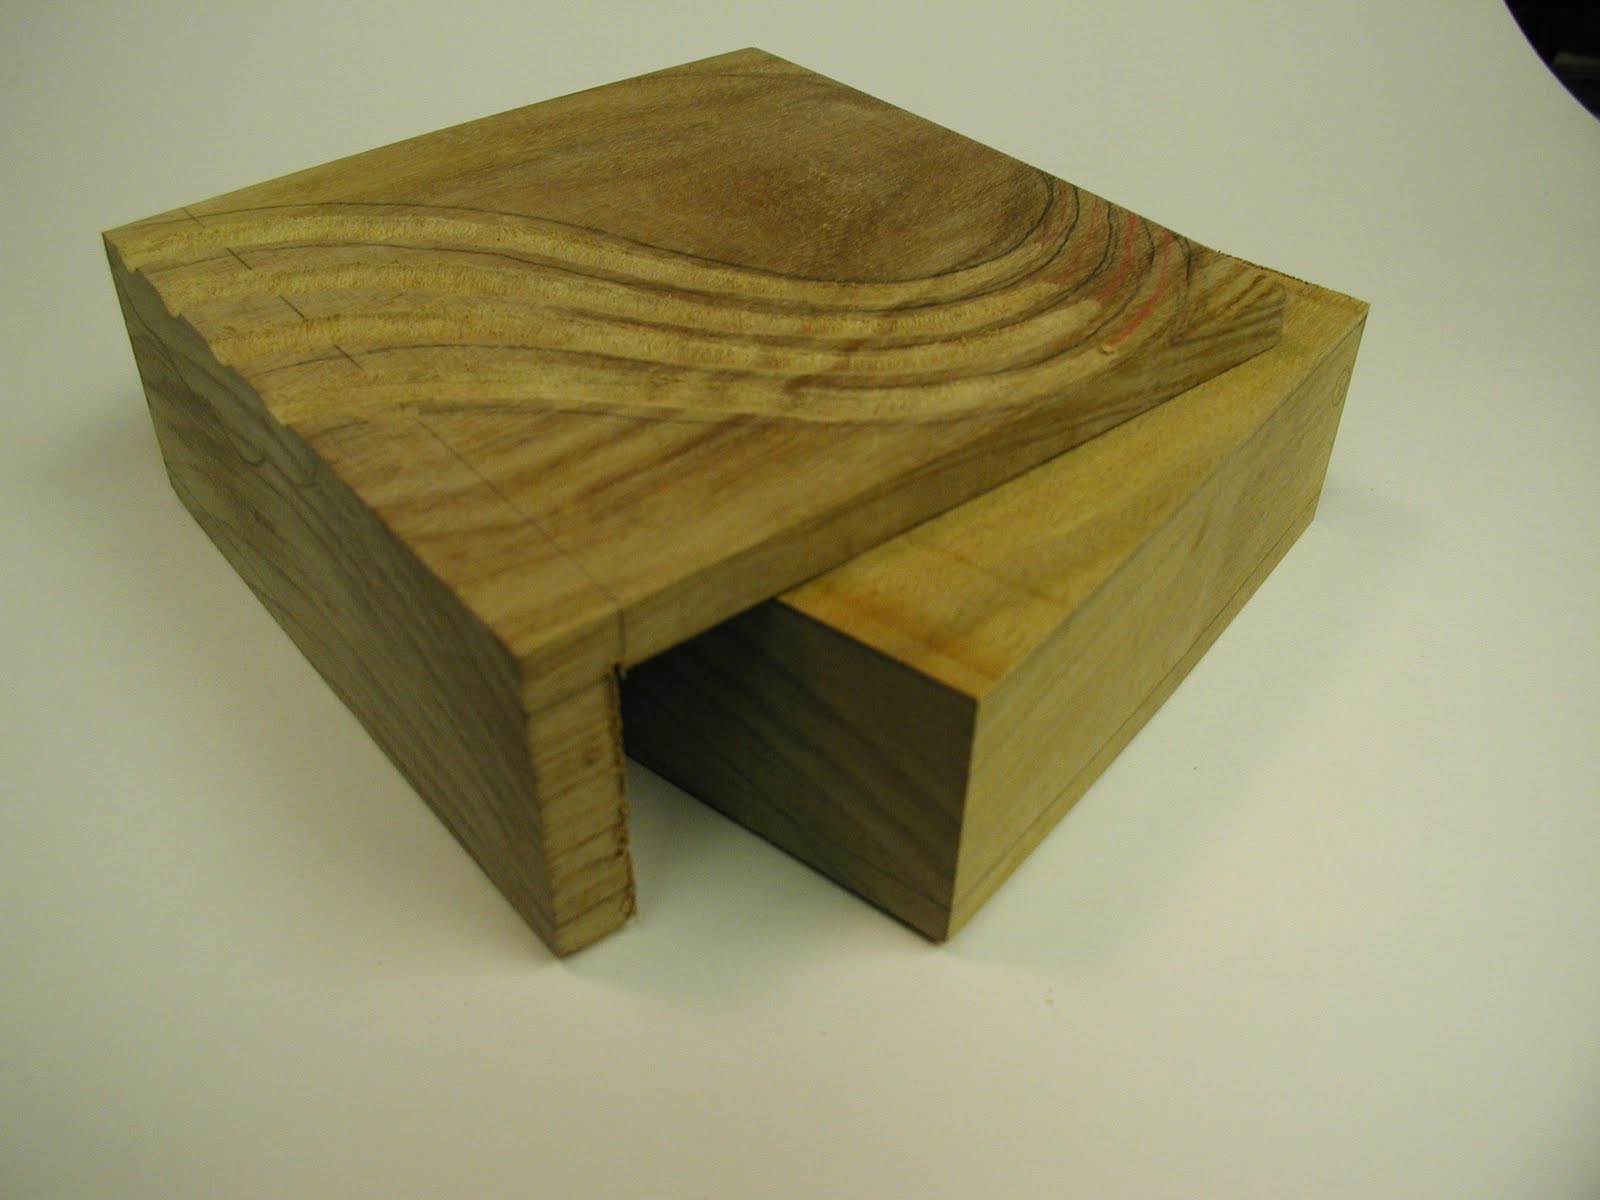
As I mentioned in a previous post, these empty wooden cigar boxes are available from my local cigar store for just $1 each, so I carve the design in the lid first, before I attempt to work on the rest of the box.  If the carving doesn’t work out, I just discard the box without wasting time on the finish or interior of the box.  Well, this carving turned out pretty good, so I went on and finished the box.  
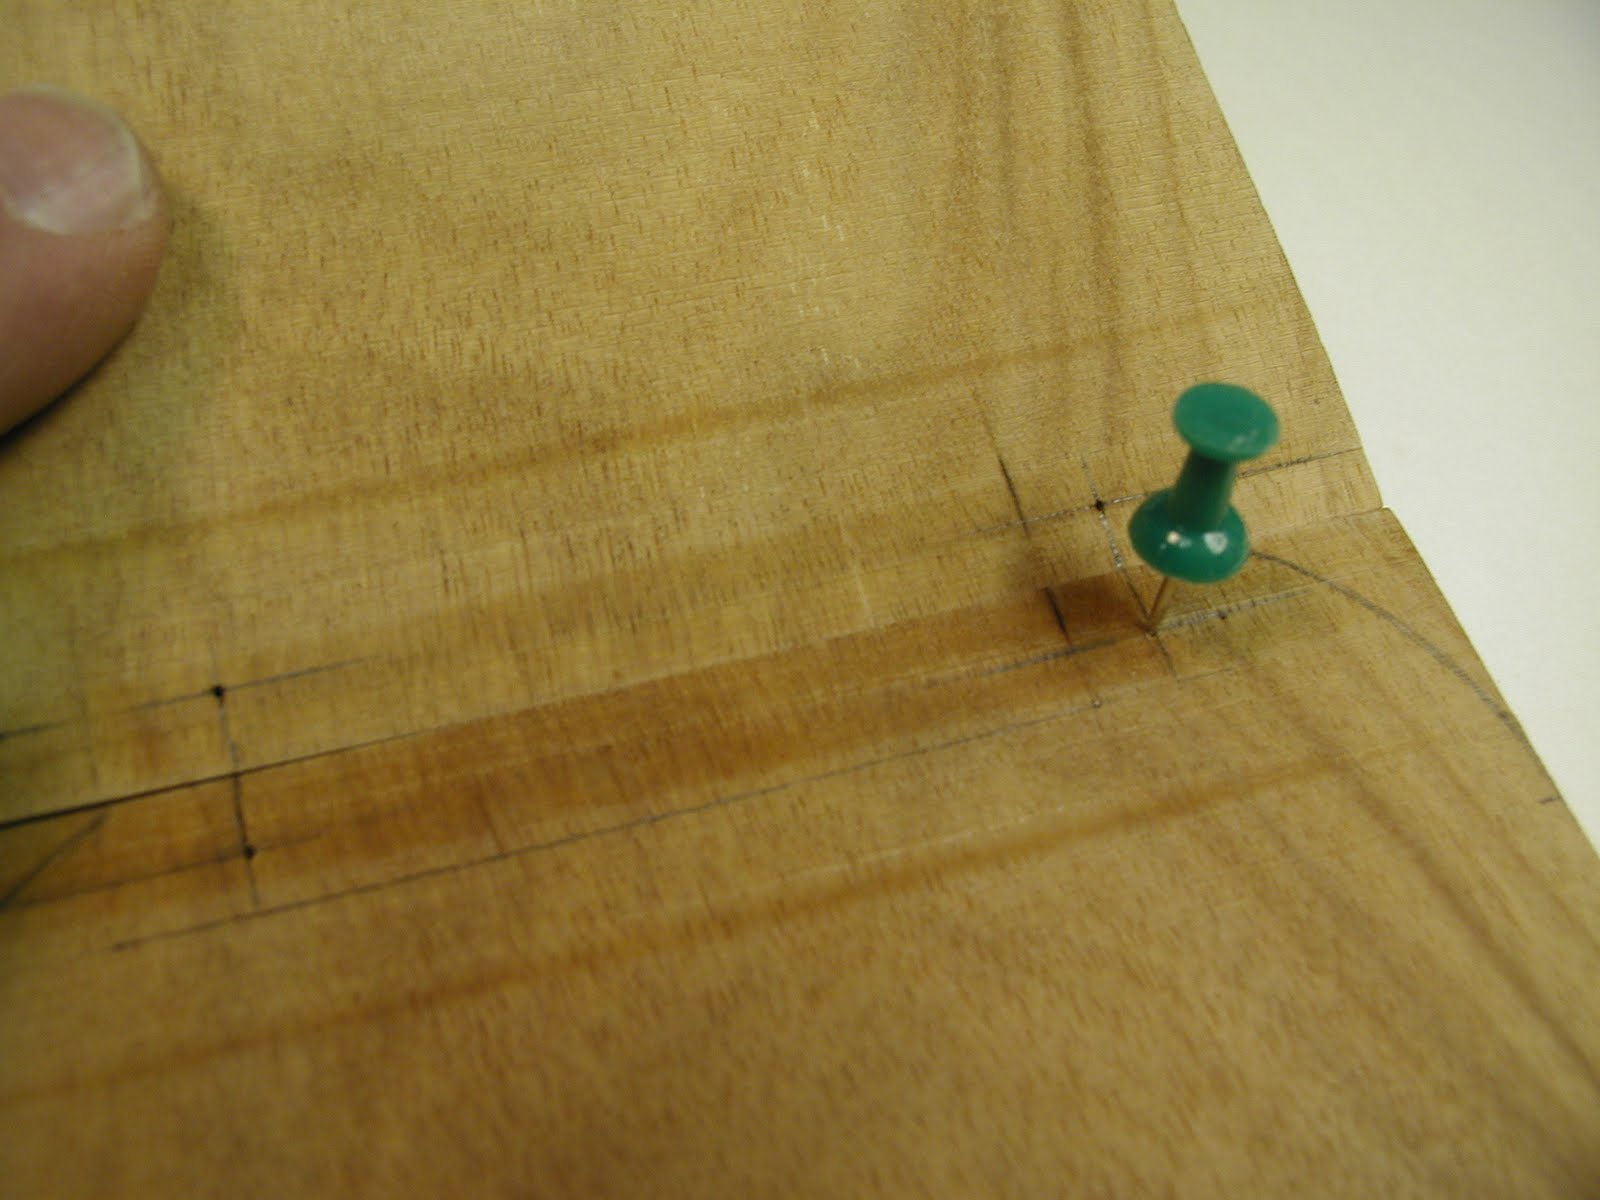
I added the black walnut corner inserts.  This was the first time I did this on any box.  I used a special jig that I built based on plans in a box making book.  I cut the thin walnut corner inserts to an 1/8 inch thickness to match the kerf slot made by my table saw blade.
 
interior tray
I finished the box by using the interior cedar side spacers that came with the box to construct an interior tray.  Like anything else, the more of these interior trays I make, the better they turn out. I’m pretty pleased with the resulting box.
The finished keepsake box
Now, I have to get inspired for my next carved box.  Any suggestions?


Saturday, August 10, 2013

Carved Wooden Doors of Europe

door on street in Florence, Italy
detail of door on the left
 
There is something about carved wooden doors in Europe that captivates me.  Many are beautifully works of art.  Some are centuries old.  Some are in cathedrals, but others are on ordinary city streets. You don't see many doors like this in the United States. 
Here is a collection for your enjoyment.
 

door to choir loft - St. Peter's Church - Munich
door on street in Florence, Italy


Detail on main door of Basilica of Santa Maria degli Angeli near Assisi, Italy
 
side panel of door shown to the left
Basilica of Santa Maria degli Angeli
Cathedral of St. Lorenzo - Perusia, Italy

Wednesday, August 8, 2012

Carving Japanese Crests on Old Cigar Boxes

In my search for interesting symbols to carve on recycled wooden cigar boxes, I discovered Japanese crests. These crests, also called mon, or in the case of family crests, kamon, have been an important element in Japanese design for centuries. Their history and usage throughout the ages is an interesting subject. I will not go into the history in this posting, but you can do your own research on the internet. The crest symbols were originally used by the samurai and powerful warlord families. Today they are used primarily as decorative symbols for fabrics, tattoos, and corporate logos. The three diamond Mitsubishi logo for example, seen on all their vehicles, is actually the family crest. It symbolically represents three water chestnuts.


I started by getting a good reference book which shows hundreds of Japanese crest patterns and variations. Certain designs are perfect for carving; others are not. Some crests, even though very beautiful, are just too detailed and intricate to carve in wood. Some crests are very dramatic and impressive; others are rather mundane.

Most representations of the mon symbols are seen as two dimensional impressions on paper, fabric or skin. Carving them into wood presented some problems with proportions and spacing because of the depth dimension and sloped edges. Also, in the two dimensional representations, there is almost always an important contrast of positive and negative spaces…usually dark printing on a light background. Showing this contrast in uniformly colored wood required some added steps. I wound up using dark background stains and pyrography.

Despite these challenges, I was able to find a few crest designs that seemed to lend themselves to carving on the top of a wooden box. Three are shown in the photo above. Have you ever used Japanese crests in your work?

Thursday, January 19, 2012

A More Manly Cigar Box Transformation


I was getting tired of carving flowers into empty wooden cigar boxes and transforming them into jewelry boxes and tea caddies.  I needed to make something more manly; something a man could appreciate.  I wound up making a box for my son-in-law for Christmas.  A woman puts her “stuff” in a jewelry box.  A man puts his “stuff” into a…valet box, or utility box, or something. I guess it doesn’t have an official name.


The design is a Celtic snake which is an adaptation of a tattoo design.  That’s manly.  I call it the Snake Box…very manly. The cigar box is made in Honduras using sapele wood, which is native to Africa.  Sapele is pretty nice to carve, sort of like mahogany, but it can get splintery in spots.  You also might run into hard knotty areas and irregular grain patterns. Most of the side pieces of these cigar boxes are made of quarter sawn sapele which usually shows a brilliant ray pattern.


After carving and sanding, I used an Ebony stain to darken the recess area.  I then stained the entire box with a Golden Oak stain.  I lightly sanded all the raised areas of the design to give added highlights.

I made the interior trays entirely from wood from other scrap cigar boxes.  The sides are Spanish cedar and the bottoms are thin plywood.  It is not shown here, but I left the cigar manufacturer’s imprinting and brand on wood on the bottom of the trays.  It sort of keeps a connection with the original use as a cigar box. It says “Made in Honduras” and “Hecho a Mano”.  I added small wooden feet, which helps the transformation from an ordinary cigar box to handsome valet box.

I used a maroon felt with an alligator skin pattern, adding to the manly look.  The top tray slides back and forth over the bottom tray to expose or hide the bottom compartments.


If, like me, you are tired of carving flowers, find a Celtic tattoo pattern and carve something manly.

Sunday, December 11, 2011

Colorful Carved Coffins of Ghana

http://www.ghana-net.com/fantasy-coffins-of-ghana---fantasie-saerge-in-ghana
In one of my previous posts, I talked about wood carving in Ghana.  There is another important expression of wood craftsmanship in Ghana that should also be mentioned.  I’m talking about hand-crafted wooden burial coffins, in the shape of everything from a Coke bottle to a Mercedes.  This colorful art form is unique to Ghana.

For most tribal cultures in Ghana, especially the Ga people from around Accra, funerals are not only a time of mourning, but also a time of celebration.  They can last a week with food and music and every relative and friend in attendance.  The people believe that their departed loved one is moving to another life, and they make sure they do it in style.

In the 1960’s a creative carpenter named Seth Kane Kwei started making custom designed fantasy coffins which were called Abebuu adekai (" boxes with proverbs ") by Ga people.  The concept became very popular and the construction of these coffins is still carried on today by relatives and former apprentices of Kwei in a number of wood shops scattered around southern Ghana.  The coffins are designed to represent an important aspect of the deceased person’s life.  It may be a taxi cab, if the person was a driver; or a fish if the person was a fisherman.  It may be symbolize the person’s hobby, pet or even a vice like a bottle of beer or a cigarette. 


The coffins are custom-made and can take up to three weeks to complete.  During that time the deceased person is kept in a refrigerated morgue.  Most coffins are usually made from a light, inexpensive wood such as wawa or alstonia boonei (cheese wood).


These special coffins are works of art, built by skilled carpenters; designed and finished by talented wood artists. Unlike many works of wood art that remain visible for centuries; these wood creations are buried with the deceased, never to be seen again. It is truly art for the moment, transitory art, like Tibetan Buddhist sand paintings. Each coffin is returned to the same earth that nourished the original tree which gave the wood to build the coffin. The cycle is complete.


The concept of hand-worked wood returning to the earth is the same for any wooden coffin, whether it is Ghana or an old cemetery here in the United States. The wood decays in the ground and a new tree grows, but the skill of the wood craftsman remains constant through all generations.


Not Ghana, but the Moravian Cemetery, Bethlehem, PA


Tuesday, October 25, 2011

Wood Carving in Ghana


"I am coming to cut you down and carve you, receive this egg and eat…do not let the iron cut me, do not let me suffer in health.
…a prayer said by a carver to the spirit of the tree.
Documented by Prof. R.S. Rattray in a thesis “Religion and Art in Ashanti” (1927)

my souvenirs
Many years ago, I had the opportunity of spending a week in Accra, Ghana on business.  Like a typical tourist, I brought back a few carved wooden souvenirs. Not until recently did I become aware of the extent of woodcarving in Ghana and its importance to the economy of the country.

Wood carving is done throughout Ghana, but it is mostly centered in the Ashanti region just north of Accra.  The small villages of Aburi and Ahwiaa are mentioned often on the web as wood carving centers.  The wood carving tradition was always an important part of the culture of  the ethnic Akan people who, for centuries, have occupied all of Ghana and part of the Ivory Coast.

modern Ghana sculpture
Today, Ghanaian wood carvers produce an endless variety of figurines and plaques for the tourist trade, or for export to other countries.  Some are cleverly designed with modern African figures and animals.  If you go back 100 years or more, however, you wouldn’t see such individual creativity.  In the old days, carving was done as a communal, not individual, form of expression.  Deviation from community accepted standards and designs was tabooed.  Carving was done under the strict direction of clan leaders, and was totally done by men.  Not every man carved.  The carvers were seen as a privileged minority endowed with special skills from God.  They even had their own secret initiation rituals for apprentices.

carving a djembe drum
The traditional Ghanaian carved wood items include: drums, masks, (Akuaba) fertility dolls, mortars and stools. All these items are still made and exported today.   The form and design of these items has changed very little over the years.
an Ashanti stool
The stools are a topic by themselves.  They were a symbol of status among the tribal leaders and can also be a carved record of maternal genealogy. They are carved from a single piece of wood.  The seat part is curved and represents the warm embrace of a mother. The center middle section contains symbols that indicate the owner’s beliefs, history or values. Most stools had an Adinkra symbol on the front.  These symbols were also stenciled on cloth. They are used today on many handicraft items.  Most modern Ghanaians know the meanings of each Adrinka symbol. The symbol on the stool in the photo above is called Gye Nyame, or "except for God", and indicates the supremacy of God.
carving stools
Since ancient times, trees in Ghana were considered dwelling places of supernatural spirits and powers, both benevolent and malevolent.  The trees felled for carving were given certain ritual purification rites.  When a carver acquired a new set of tools, the tools had to be pacified to solicit good and cordial relations from the spirits.  Strong alcoholic drinks were poured on the tools and special libation prayers were offered.  (See an excerpt from a prayer at the top.) 
In Ghana, the primary woods used in carving are Sese (Holarrhena wulfsbergii) and Tweneboa (Cordia millenii). The tweneboa is a sacred tree.  Its name literally means "drum tree".  It is relatively soft and easy to carve and sometimes already hollow, which makes it ideal for drum making.  Most Kpanlogo drums are made from tweneboa.  Other woods used include: Afromosia, Mahogonay, Odum “Iroko”, Cedrela and Sinuro.
a young carver
The wood carvers in Ghana today work 10 hours a day, 7 days a week. They make their own tools out of iron and steel and keep them very sharp. Do a video search on-line for “Ghana wood carvers” and you will see some amazing carving with simple tools, and no fancy vises or fixtures. I especially like the drum carving video.
The information in this post was obtained from various sources on the web including an informative report entitled "Carving Tradition in Ghana", by the Ghana Natinal Commission for UNESCO.

Wednesday, September 21, 2011

Mass Production...sort of


I’ve been selective is scavenging empty wooden cigar boxes at my local cigar emporium. One particular brand of cigars comes in boxes that are made from thick sapele wood. The tops are extra thick and ideal for carving. I decided the size of the box would make a great tea bag caddy. I carved the top in an Oriental fashion with the Chinese (also Japanese) symbol for tea. I was pretty pleased with the result, but there were a few things I thought I could improve upon if I did another one. Then I thought, since I have more of the same size cigar boxes, why not make two more. It was an experiment in mass production on a small scale.

Perhaps I could make lots of these tea bag caddies and sell them at craft shows, or give them away as gifts. I hear stories of other artisans who make many pieces of the same design and give them away. One ambitious person actually made several hundred small band saw boxes; one for every guest at his daughter’s wedding.

The result of my experiment was that I came to the realization that mass production is not for me. For one thing, carving boxes does not lend itself to mass production. It’s not like baking cookies or making a jar of peach jam for each of your relatives and friends. Other than using the same design, there is no economy of scale in carving since there are just as many wood chips removed no matter how many boxes you carve.

Even if there was a time benefit, I just don’t like making the same thing over and over again. I like to experiment with new approaches and different techniques. After I made the second tea bag caddy, the third one really became a chore. As I was making it I was thinking of all the other creations in my head that I could be making instead of this duplicate. I guess I’ll just stick to individual pieces.


Saturday, August 27, 2011

Wooden Spoons: a novel by Dennis Ruane


My daughter pointed out a novel that she thought I might be interested in. It’s called “Wooden Spoons” by Dennis Ruane. It is promoted as a novel about life, death, love and art. The title and description intrigued me so I bought the novel and read it. It was easy reading and a good summer vacation novel; more like a made-for-TV movie than a great work of fiction, but enjoyable none the less.


It is about a professor who abandons his position at the university, leaves his wife and isolates himself on his old family homestead on a mountain top in southwestern Pennsylvania. He lives in the old ways and begins carving wooden spoons. Don’t expect a lot of details on the wood carving itself. That area is presented in a pretty general manner. The novel touches on themes like: finding out what you were meant to do in life, and then having the courage to do it; preserving historical sites; making utilitarian things from wood with hand tools in the traditional manner; and focusing on what is important in life. All good stuff.  There is a plot conflict with a treacherous land developer that makes things interesting, and a nice ending.


“Wooden Spoons” is a semi-autobiographical novel. The author Dennis Ruane grew up in southwestern Pennsylvania like the character in the book. Also, like the character, Dennis abandoned a career in science to become a full time wood carver. More than just a carver, Dennis is a creative wood artist. Visit his website at: http://www.dennisruane.com/, to will see examples of his work.

You can buy a used (like new) paperback on Amazon for about $10. Enjoy.

Monday, July 11, 2011

Carved Carousel Horses at Knoebel's

I’ve heard about Knoebel’s Amusement Resort for many years, but never had the opportunity to visit until the family went there to celebrate my Aunt Millie’s 80th Birthday last month.  Knoebel’s is a very unique and wonderful place.  It is an old fashioned amusement park with no admission charge and free parking!

The Grand Carousel

The prices for the rides are so low, at first I thought I was reading them wrong. The kiddie rides cost 75 cents and the big wooden roller coaster costs only $2.25.  Knoebel’s is not located on some busy interstate, but rather in a quiet valley on the back roads of rural central Pennsylvania.   It’s been family owned and going strong for over 85 years.  It’s probably the cleanest and best maintained amusement park that I have ever been in.

The Stein & Goldstein Carousel
There are hundreds of free picnic tables available for use, in various roofed pavilions, in “the grove”. We reserved four for the party. No charge. You may have never heard of Knoebel’s but you can bet the people of central Pennsylvania have. They keep it a secret for themselves, even though Knoebel’s has won international awards.

But Knoebel’s is more than just an amusement park. It is a “must visit” sight if you are interested in carved carousel horses. They have not one, but two carousels with carved horses, and an excellent carved carousel animal museum.

The Grand Carousel was built in 1913 by George Kremer, who bought the carved wooden horses from wood carver Charles Carmel.  It is a four-abreast machine that used to be at Riverside park in Rahway, NJ.  The Kiddieland Carousel was built around the same time by Stein and Goldstein in Brooklyn, NY.  Both carousels have beautiful examples of carefully restored carved horses from that period. You almost think they should be preserved somewhere instead of being exposed to daily wear and tear.  But then, that’s what they were carved for in the first place.
The Carousel museum is small but it contains a complete history of carved carousel horses and shows how they developed from crude figures to the elaborate styles of the early 1900’s, the Golden Age of Carousels.  They also have a fine collection of carved carousel animals other than horses.
It’s interesting to think that a century ago, when these beauties were carved, the carvers who created them were probably considered as little more than laborers, yet their artistic skills and craftsmanship would make them well respected artisans today.   Visit Knoebel’s and appreciate their work.

Saturday, April 9, 2011

The Look, Touch and Smell of Wood

I remember visiting Duckloe Furniture in Portland, PA several months ago. They have exquisite examples of American hand-crafted furniture. Their showroom is filled with everything from Arts and Crafts and Shaker styles to Windsor Chairs that they have been making themselves for over 150 years. The woods and grain patterns are awesome. Words like bird’s eye, tiger, quarter-sawn and burl are used a lot in the wood descriptions of the items on display.

Like a naughty child, I found myself touching everything. As I ran my hand across the top of a table or over the carved decorations I realized how much I love to touch wood. There is a tactile sensation that brings me joy. The smoothness of the finish, the beauty of the grain pattern, even the smell of the beeswax and oil, all contribute to my sensual enjoyment.


I get a similar feeling in my own workshop. It may be the fine sawdust that remains in the pores of your hand after sanding; or feeling the contour of a piece you just carved. I’m sure many of you fellow woodworkers know what I mean. I remember finishing a spoon with wax and mineral oil and then sitting watching TV and just rubbing the finish with my bare hands for quite some time. It was a comforting sensation. You may argue that velvet or leather also gives tactile pleasure, but when it comes to hard materials, nothing beats wood.


I just completed my Salamander Cane. It was my first attempt in carving a critter wrapped around the cane. Instead of carving a detailed snake with hundreds of tiny scales like the award-winning artist, Dave Stehly, I chose a much simpler piece for my first attempt. The salamander is a lot smaller and its skin is smooth and easy to carve. I liked the feel of the wooden cane handle. I realized why canes and walking sticks are made of wood. For some reason, it just seems natural.


Has working with wood heightened your sensual awareness?


Friday, February 18, 2011

Making the Canary Wood Box

As promised, here are instructions, photos and tips that follow my work on the Molten Wood band saw box made from a chunk of canary wood.

I purchased this slab of canary wood about 6 years ago from a bargain table at Woodcraft. I've been waiting for the right project. The first step is to draw the design on the wood.


I used power carving tools to get the deep wave grooves. A round bur works best. Start coarse and work to fine.


Rough shape of the wave grooves completed. It's time to go to the band saw.


Here's where it gets a little tricky. Instead of just sawing off the top of the box like you would in making a normal band saw box, you saw up to a marked point and then saw at 90 degrees to that line to create the overhang.


Next, use the band saw to cut out the overhang shape. This is hard to explain, but it is probably obvious to any woodworker.


Here's the way the overhang looks after sawing. As you can see, I cut a little too far into the first wave. This will have to be fixed up later.


Now, cut off the bottom as you would normally do when making a band saw box.


The trickiest part of making this box is getting the barrel hinges to align perfectly. If they are off by even one millimeter, the box will never open and close properly. Accuracy is essential. Wood crafters have many tricks for getting proper alignment. You can find them on the internet. As for me, I have found that careful measurent and a brad tipped drill bit can get you right on the money. I start by exact measurement lines and precise marking with a push pin to set the exact hole center.


The barrel hinges are cylinders 5 mm in diameter with a hinge pin in the middle. I bought a 5 mm brad point drill bit and I am very pleased with the results.


I clamped the wood loosely on the drill press and then carefully guided the brad tip of the drill bit into the hole made by the push pin. I then clamped it securely and drilled the hole. Since the box top is thin, be careful with the depth of the hole. The objective is to position the tiny center pin shaft of the hinge exactly at the surface of the wood on both the top and the end of the box.


The next step is to make a 45 degree cut in the lid and the base. The angle must intersect the exact middle point of the hinge at the pin so the lid will open correctly. Needless to say, this can be very tricky. Again, precise measurement is very important. Of course experience and a little luck doesn't hurt either. I used my table saw which is set up with a very accurate 45 degree crosscut sled. In the past I have also used my router table. My wood craftsmanship is far from perfect, so I wound up doing some "corrections" work on the belt sande to get everything to work properly. No glue yet. This is just a dry fit at this point to make sure all the parts work.


Up until this point I have been working with a squared off block of wood. It is important to have this "right angle" frame of reference for proper alignment and measurements. Now it's time to add some curves. I cut the outer shape of the box on the band saw.


Here's what the box looks like at this point. Remember, the inside is still solid wood.


Take off the top and bottom and use the band saw again to cut the box interior out of the middle section. I entered near the corner so it would be easier to glue and hide the entry point. The dark lines on the curved corners indicate that I need to change my saw blade. A rubber backed sanding cylinder on my rotary tool will get these marks out without much effort.


Gluing. I use Tightbond II. First glue the center section of the box together at the saw blade entry point. An elastic band clamp works fine for this. Make sure the alignment is exact.


The next step is to glue the bottom to the box side section. Use good clamps for this. Once clamped, I usually lightly sand the outer surface at the glued joint. The fine saw dust will stick to the glue and fill up any voids in the intersection.


Now comes the sanding, and lots of it. Notice how the box lid slightly overhands the side of the box. This is caused by gluing together the kerf void on the perimeter section. One side is now a bit shorter. To the belt sander! At this point I am also still forming the waves on top of the box with power carving burs and rotary sanding tools. Hand gouges were also used. Anything that works and is within reach. I mark areas that need wood taken away with a red pencil. I do this regularly during the forming process. Shape. Stop and take a look. Mark. Shape some more. A lot of patience and a lot of sawdust.


Next, I gave the whole box a light coat of wipe-on polyurethane varnish. In this photo of the back of the box, notice how the 45 degree cut is precisely at the center of the barrel hinge hole. I use epoxy to secure the barrel hinges and open and close the box severall times during the 5 minutes it takes the epoxy to set to make sure the cover sets and opens correctly. After fine sanding, I put a few coats of satin poly varnish on the box as a finish coat.


As any artisan will tell you, you have to know when to stop improving what you have and call the piece "finished". I had a perfect reminder of this on this box. I kept on sanding away on the wave grooves until I sanded right through the wood. Yikes! After hours and hours of work, I now had a hole right in the key focus spot of the piece. A tiny hole, but to me it seemed like you could drive a truck through it. Of course I panicked and thought it was the end of the world. But a little wood filler and some very precise staining and you can hardly notice the flaw. Look at the second groove from the left.


So that's how I made the box. I probably could have included another 8 or 9 photos, but it is very lengthy as it is. I hope these instructions and personal tips will be of help to you. Let me know if they were.